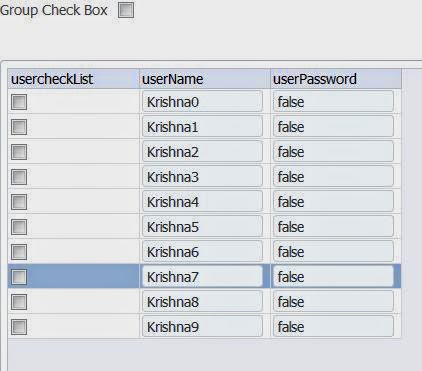
Group Check and Group Unchecked ADF Table ( Using Data controls ) using Java code -
PartialTarget
Simple requirement Select all and un selected all row in ADF Table

Java code :
package view;
import javax.faces.event.ValueChangeEvent;
import oracle.adf.model.BindingContext;
import oracle.adf.model.binding.DCBindingContainer;
import oracle.adf.model.binding.DCIteratorBinding;
import oracle.adf.view.rich.component.rich.data.RichTable;
import oracle.adf.view.rich.context.AdfFacesContext;
import oracle.jbo.Row;
import oracle.jbo.RowSetIterator;
import oracle.jbo.ViewObject;
public class ClassDemo {
private boolean masterCheckbox=false;
private RichTable tableBinding;
public void DemoValueChange(ValueChangeEvent valueChangeEvent) {
String NewVal = valueChangeEvent.getNewValue().toString();
DCBindingContainer dcBindings =(DCBindingContainer)BindingContext.getCurrent().getCurrentBindingsEntry();
DCIteratorBinding dciter = dcBindings.findIteratorBinding("userDetailsIterator");
ViewObject vo = dciter.getViewObject();
RowSetIterator RowSetI= vo.createRowSet(null);
RowSetI.reset();
while (RowSetI.hasNext()) {
Row row=RowSetI.next();
row.setAttribute("usercheckList", NewVal);
}
RowSetI.closeRowSetIterator();
AdfFacesContext.getCurrentInstance().addPartialTarget(tableBinding);
}
public void setMasterCheckbox(boolean masterCheckbox) {
this.masterCheckbox = masterCheckbox;
}
public boolean isMasterCheckbox() {
return masterCheckbox;
}
public void setTableBinding(RichTable tableBinding) {
this.tableBinding = tableBinding;
}
public RichTable getTableBinding() {
return tableBinding;
}
}
JSPX Code :
<af:selectBooleanCheckbox
label="Group Check Box" id="sbc2"
autoSubmit="true"
valueChangeListener="#{pageFlowScope.CheckBoxMbean.DemoValueChange}"
value="#{pageFlowScope.CheckBoxMbean.masterCheckbox}"
partialTriggers="t1"/>
Table Property :
<af:table value="#{bindings.userDetails.collectionModel}" var="row" contentDelivery="immediate"
rows="#{bindings.userDetails.rangeSize}"
emptyText="#{bindings.userDetails.viewable ? 'No data to display.' : 'Access Denied.'}"
fetchSize="#{bindings.userDetails.rangeSize}"
rowBandingInterval="0"
binding="#{pageFlowScope.CheckBoxMbean.tableBinding}"
selectedRowKeys="#{bindings.userDetails.collectionModel.selectedRow}"
selectionListener="#{bindings.userDetails.collectionModel.makeCurrent}"
rowSelection="single" id="t1">
Data now refresh using java code .
Happy Coding :-)
PartialTarget
Simple requirement Select all and un selected all row in ADF Table
Java code :
package view;
import javax.faces.event.ValueChangeEvent;
import oracle.adf.model.BindingContext;
import oracle.adf.model.binding.DCBindingContainer;
import oracle.adf.model.binding.DCIteratorBinding;
import oracle.adf.view.rich.component.rich.data.RichTable;
import oracle.adf.view.rich.context.AdfFacesContext;
import oracle.jbo.Row;
import oracle.jbo.RowSetIterator;
import oracle.jbo.ViewObject;
public class ClassDemo {
private boolean masterCheckbox=false;
private RichTable tableBinding;
public void DemoValueChange(ValueChangeEvent valueChangeEvent) {
String NewVal = valueChangeEvent.getNewValue().toString();
DCBindingContainer dcBindings =(DCBindingContainer)BindingContext.getCurrent().getCurrentBindingsEntry();
DCIteratorBinding dciter = dcBindings.findIteratorBinding("userDetailsIterator");
ViewObject vo = dciter.getViewObject();
RowSetIterator RowSetI= vo.createRowSet(null);
RowSetI.reset();
while (RowSetI.hasNext()) {
Row row=RowSetI.next();
row.setAttribute("usercheckList", NewVal);
}
RowSetI.closeRowSetIterator();
AdfFacesContext.getCurrentInstance().addPartialTarget(tableBinding);
}
public void setMasterCheckbox(boolean masterCheckbox) {
this.masterCheckbox = masterCheckbox;
}
public boolean isMasterCheckbox() {
return masterCheckbox;
}
public void setTableBinding(RichTable tableBinding) {
this.tableBinding = tableBinding;
}
public RichTable getTableBinding() {
return tableBinding;
}
}
JSPX Code :
<af:selectBooleanCheckbox
label="Group Check Box" id="sbc2"
autoSubmit="true"
valueChangeListener="#{pageFlowScope.CheckBoxMbean.DemoValueChange}"
value="#{pageFlowScope.CheckBoxMbean.masterCheckbox}"
partialTriggers="t1"/>
Table Property :
<af:table value="#{bindings.userDetails.collectionModel}" var="row" contentDelivery="immediate"
rows="#{bindings.userDetails.rangeSize}"
emptyText="#{bindings.userDetails.viewable ? 'No data to display.' : 'Access Denied.'}"
fetchSize="#{bindings.userDetails.rangeSize}"
rowBandingInterval="0"
binding="#{pageFlowScope.CheckBoxMbean.tableBinding}"
selectedRowKeys="#{bindings.userDetails.collectionModel.selectedRow}"
selectionListener="#{bindings.userDetails.collectionModel.makeCurrent}"
rowSelection="single" id="t1">
Data now refresh using java code .
Happy Coding :-)

